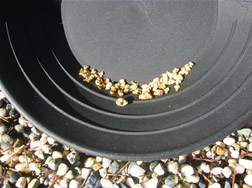
To Prepare:
Find a safe creekside spot or a trough deep enough and wide enough to immerse your gold pan and give you room to move it around.
Fill your gold vial with water. (Distilled water is best because it won't discolor over time)
Step I - The Washing Technique (roll up your sleeves!):
- Fill gold pan with contents of the bag, or other sand and gravel not more than 2/3 full.
- Immerse pan in water.
- Make sure the "riffles" (the raised ridges in the pan) are always turned to the side farthest away from you.
- Keeping all material in the pan, stir the sand and gravel with your hand while underwater until it is all saturated. (Be sure you rinse all material off your hand OVER YOUR PAN since gold may stick to your hands).
- While pan is still underwater, rapidly shake pan side to side for 4-5 seconds. Do not allow material to slosh out of pan at this point. This shakes the gold to the bottom (it's heaviest)
- Hold pan at an angle away from you (approx. 30 degree angle), while keeping all material under the water.
- Use a forward and back motion (approx. 3-5 times) to "wash" the upper layer of material out of your pan.
- Tilt pan back to level, completely submerge it in water and shake it side to side again, keeping all material in the pan as in step 5. This will settle any gold back to the bottom of your pan.
- Repeat steps 5, 6 & 7 until most of the material is washed out of your pan.
- If you encounter any large rocks while repeating these steps, pick them out carefully, wash them off OVER YOUR PAN and toss them away.
Once you have a couple of tablespoons of fine sand left in the bottom of your pan, go on to the "Swirling Technique."
Step II - The Swirling Technique:
- Concentrate the remaining fine material at the bottom of your pan right below the riffles.
- Carefully drain off all water in the pan except about 1-2 tablespoons.
- Using a circular motion, gently swirl the water in the pan in one direction over the sand until the lighter sand has been washed away from the heavier gold.
- Gold, being the heaviest material in your pan will stay right below the riffles. Keep an eye out!
- Once you spot the gold, tilt the pan so the water runs away from the gold.
- Whenever possible work OVER YOUR PAN in case you drop your gold. Pick up the gold with tweezers or use the "Dry Finger Technique": Gold will stick to a DRY fingertip when the fingertip is pressed to a small gold piece in your pan.
- Holding your uncapped gold vial OVER YOUR PAN, wipe your fingertip along the edge of the vial so the gold falls into the vial.
- Check to make sure the gold went into the vial, and repeat Steps 6 & 7 for all pieces of gold and replace the cap.
- Yell Eureka! And admire your riches.


